# 微前端中国际化使用
# 一.i18n 解压到 build 目录下
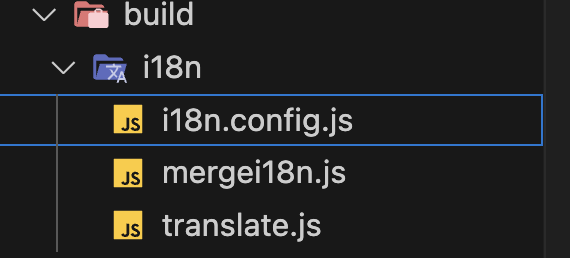
i18n目录结构如下
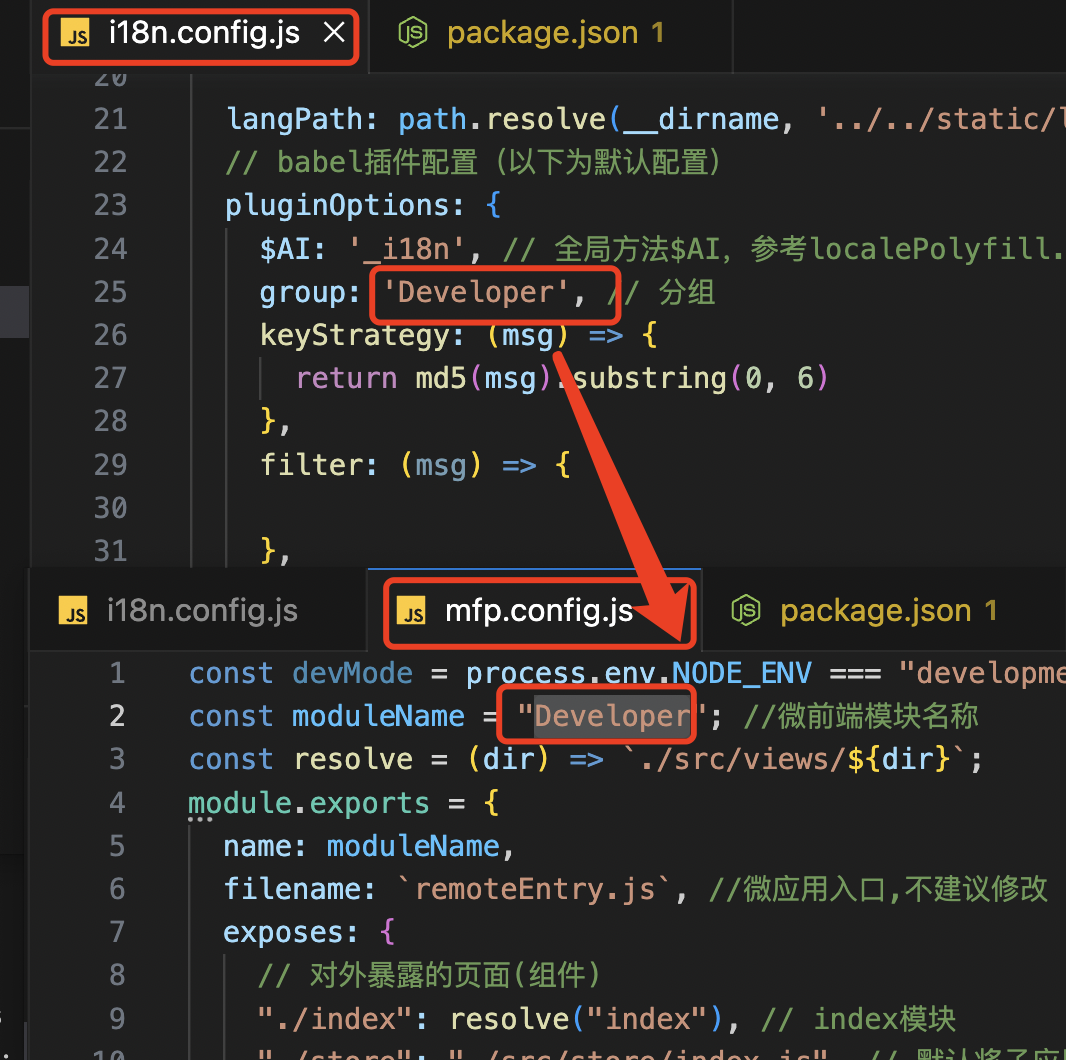
注意:i18n.config.js中的pluginOptions.group 改为build/mfp.config.js下的moduleName 一致
# 二.安装依赖
npm i i18n-auto@2.0.0 i18n-zh2other@1.0.3 md5@2.2.1
# 三.package.json 里增加命令
"build:prod-i18n": "npm run build:prod && npm run build:i18n",
"build:i18n": "cd build/i18n && node ./i18n.config.js",
"build:i18n-merge": "cd build/i18n && node ./mergei18n.js -en",
"build:i18n-translate": "cd build/i18n && node ./translate.js"
# 四.修改store/index.js
import { loadI18nJson } from 'base/utils'
loadI18nJson('moduleName') //moduleName 为 build/mfp.config.js下的moduleName
如果为微前端中有使用vue-i18n 的$t()进行的翻译,需要加如下代码
import {mergeI18nLocaleMessage } from 'base/utils'
import en from '../lang/en' //为vue-i18n的英文语言文件
import zh from '../lang/zh' //为vue-i18n的中文语言文件
mergeI18nLocaleMessage({zh,en})
# 五.运行
运行 npm run build:prod-i18n,在dist/static/lang 里 会生成 zh.json 文件
注意:build/webpack.dev.js 中的 devtool为"source-map" ,其他的devtool 可能导致生成的zh.json不正确
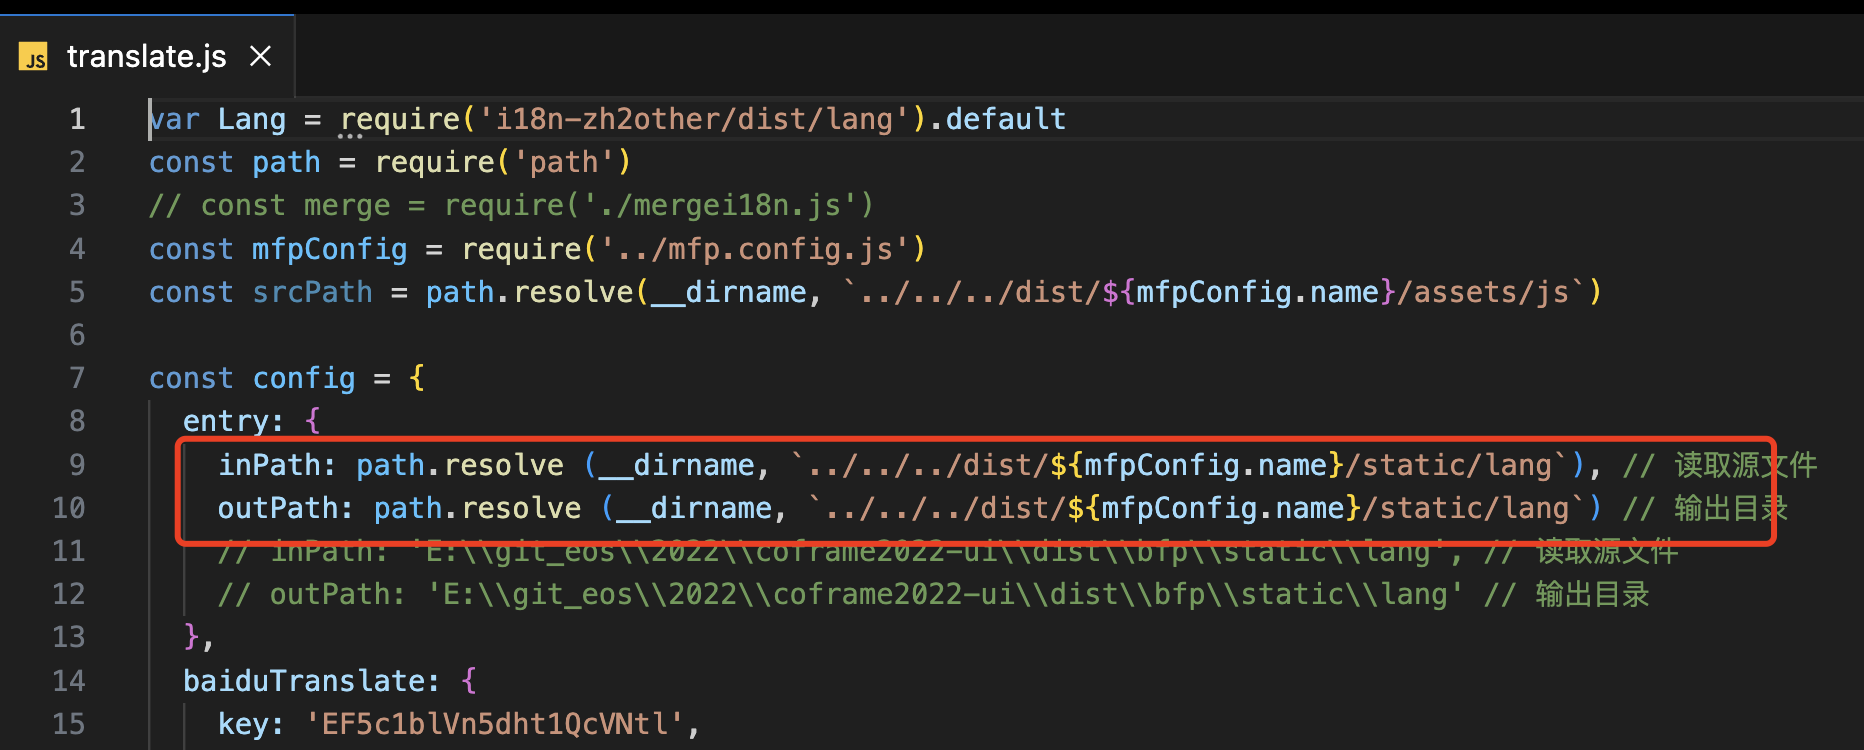
再运行npm run build:i18n-translate 会生成 en.json 文件, 将zh.json和en.json 两个文件复制到源码 /static/lang下
注意:检查build/i18n/translate.js文件中inPath、 outPath 路径地址确保此路径下有刚才生成的zh.json文件
# 六.测试国际化效果
1.把 npm run build:prod-i18n 打出来的介质(确保已存在zh.json和en.json在 /static/lang)进行部署。
注意:只有用介质部署后才能看到国际化语言切换的效果
2.在登陆页右上角切换为英文
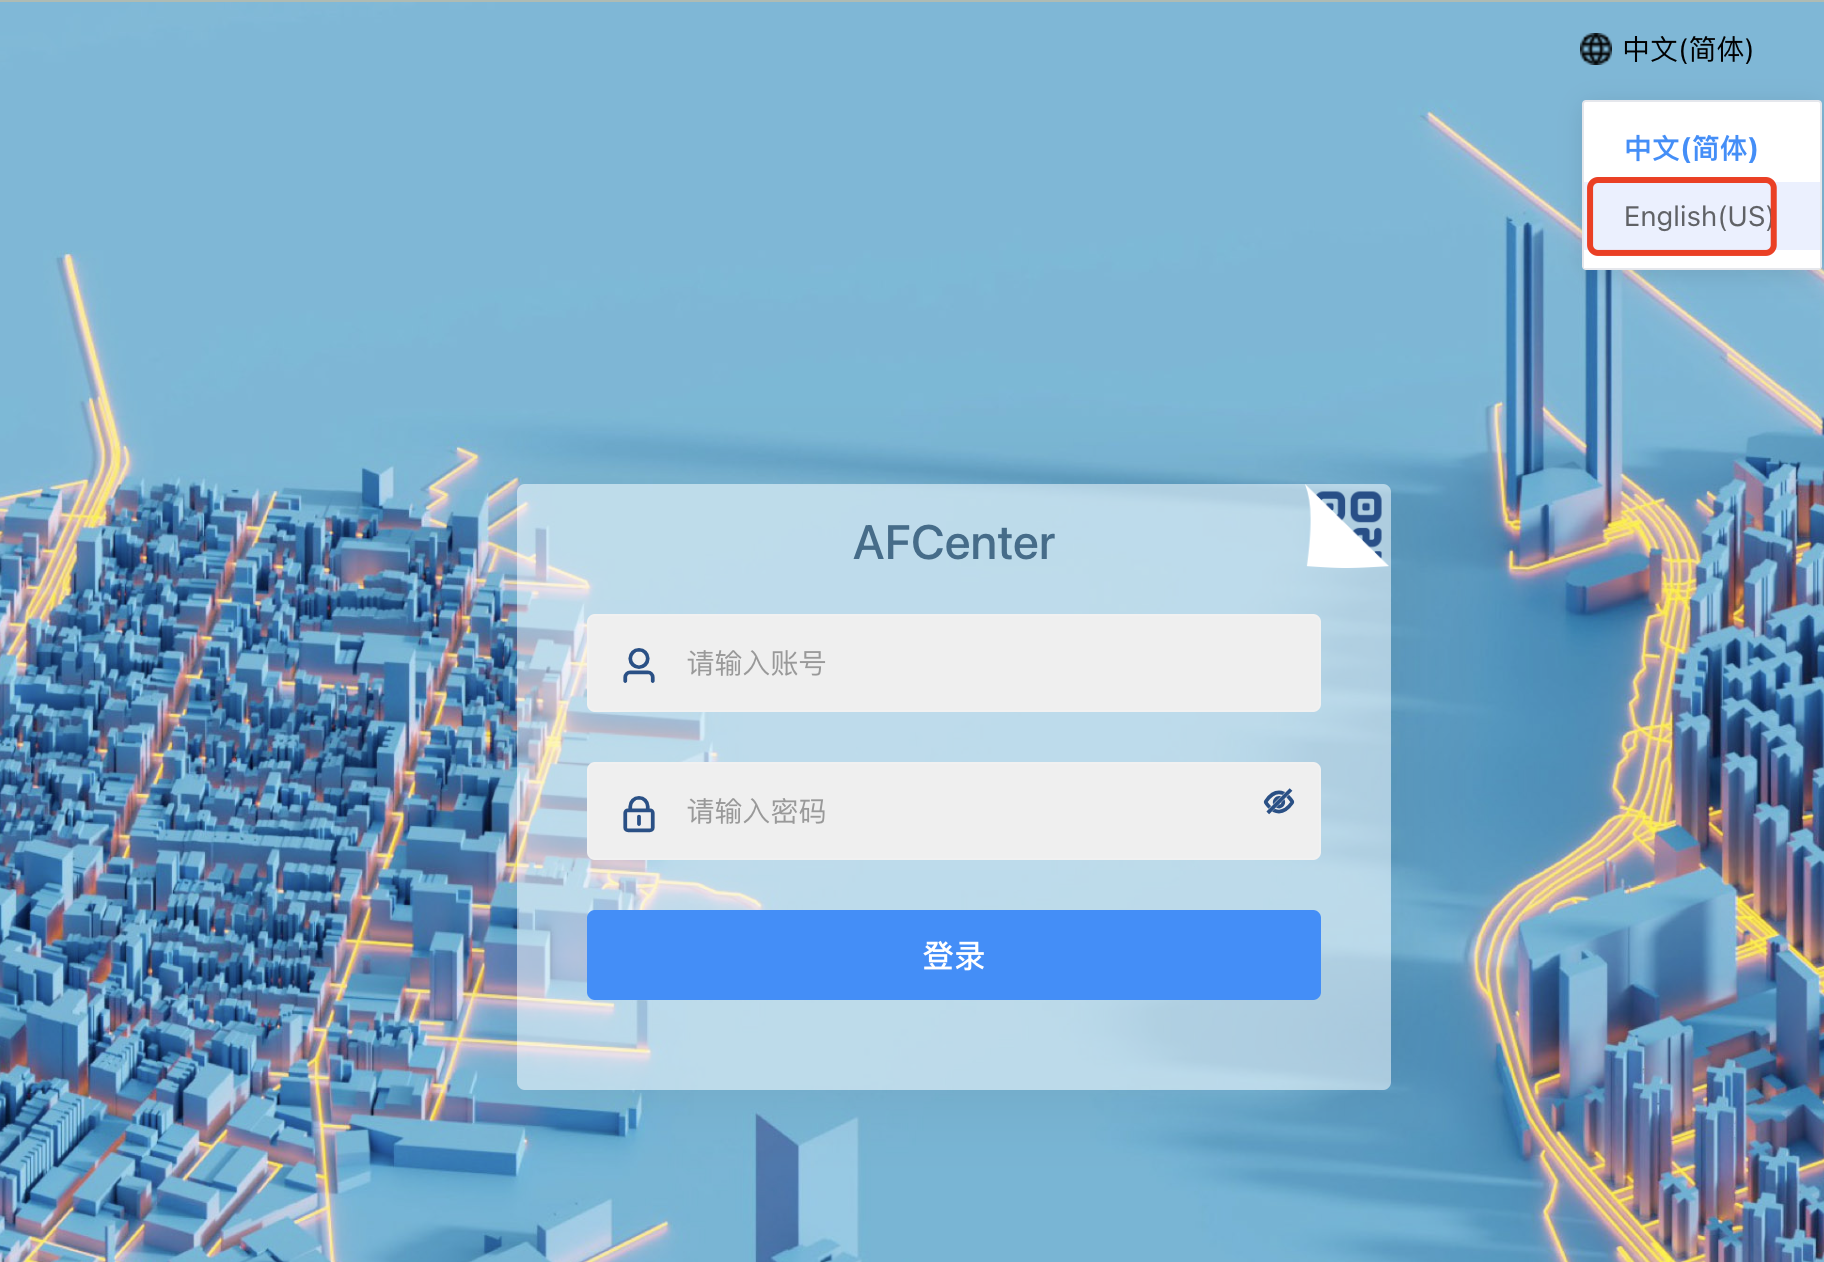
3.查看微前端页面;如果页面出现翻译后的英文就是成功了